V. Set up the plugin’s language
VI. Disabling the plugin
VII. Upgrading your subscription
After purchasing a subscription available at https://sop.zupria.com/, the license key will be available for activation (Image 1).
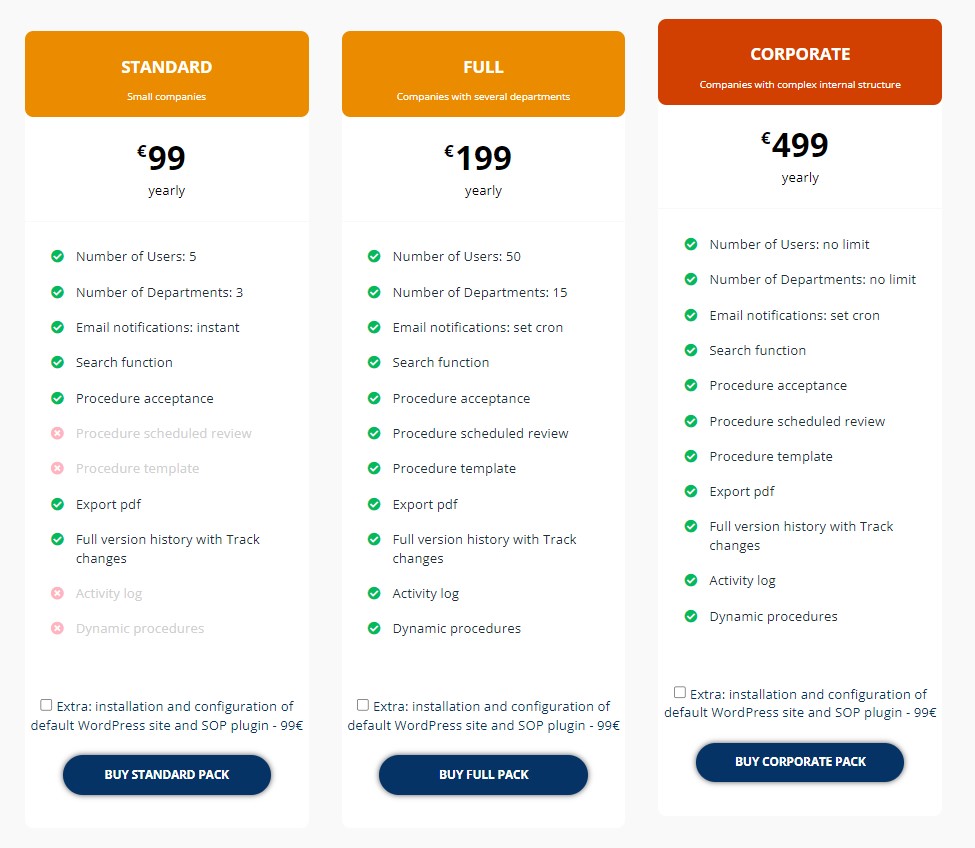
Image 1: Subscription purchase
From your account on sop.zupria.com, download the latest version of the SOP Plugin and copy the license key. From the WordPress menu, access the “Plugins” section and select the “Add New” option. Press the “Upload Plugin” button and upload the zip file you previously downloaded. Press the “Activate Plugin” button.
Access the “Settings” (Image 3) tab displayed under “Standard Operating Procedures – SOP” and paste the previously copied license. Press the “Activate License” button. The License status should be shown as “active”(Image 4).
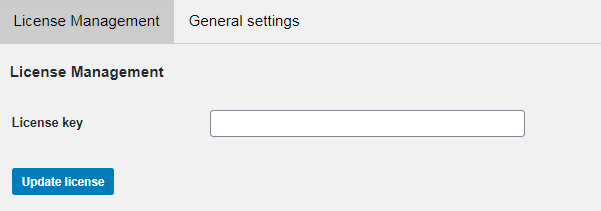
Image 2: License key input menu

Image 3: Settings menu
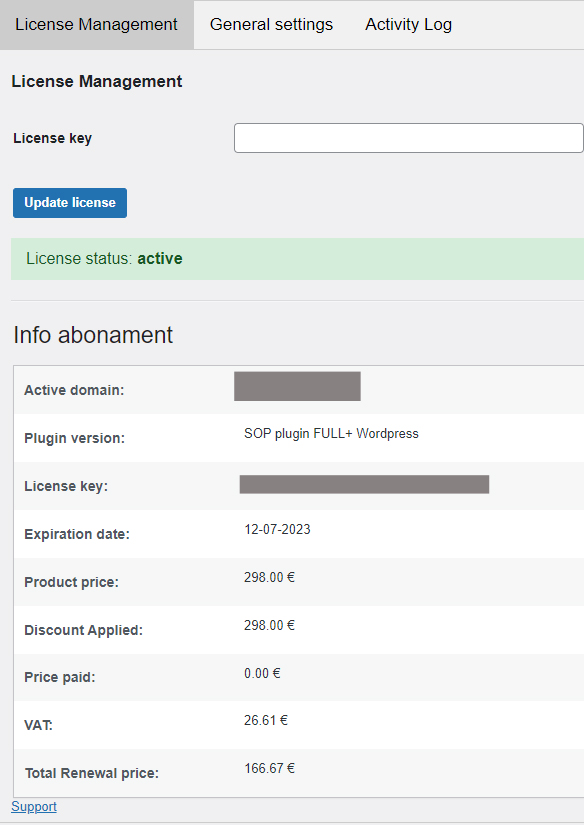
Image 4: License data menu
Once the plugin is activated, a page will be automatically created that will have the [procedures-home] shortcode inserted. This page will be the SOP parent page (homepage), which will contain the procedure categories, as well as a procedure search module by keyword, procedure categories, procedure departments, authors, or by publication or modification date. (Image 5)
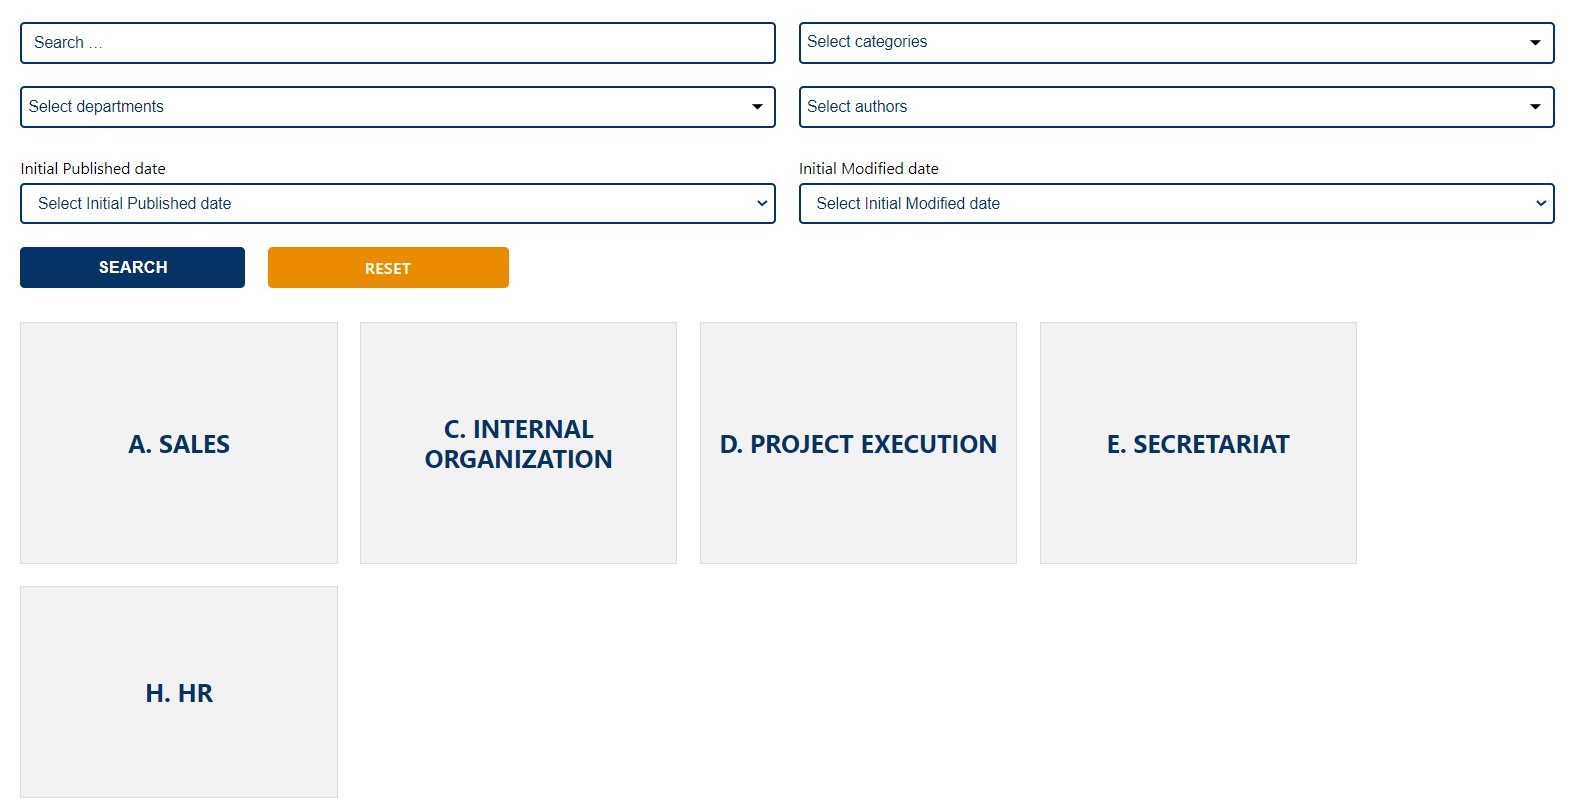
Image 5: Procedures page
The link of this page can be added to the menu of your site by following the following steps: in the site menu, in the Control Panel, access the option Appearance → Menus and add the “SOP – Procedures” page. (Image 6)
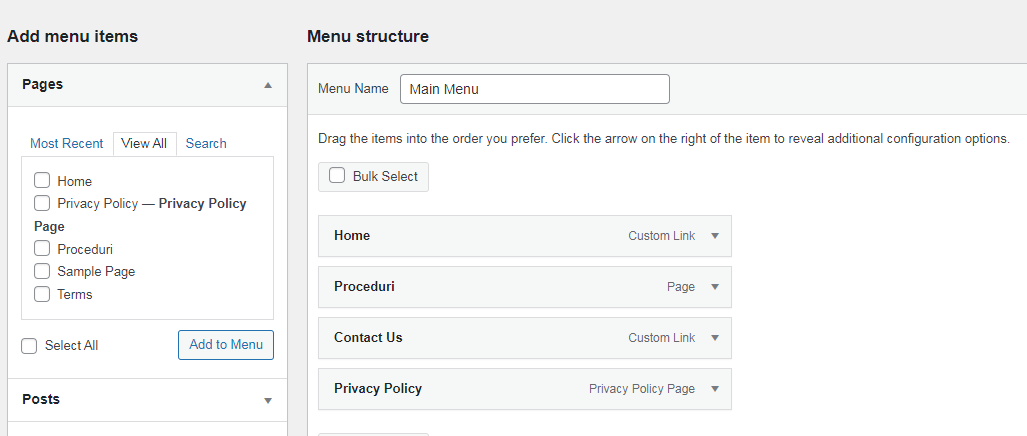
Image 6: Page adding in menu
Procedures are organized by Categories, and each team member has access to the procedures that apply directly to them for the performance of the tasks specific to their position, but also to common procedures that concern the entire team. Each category page will only contain procedures that are part of that category. (Image 7)
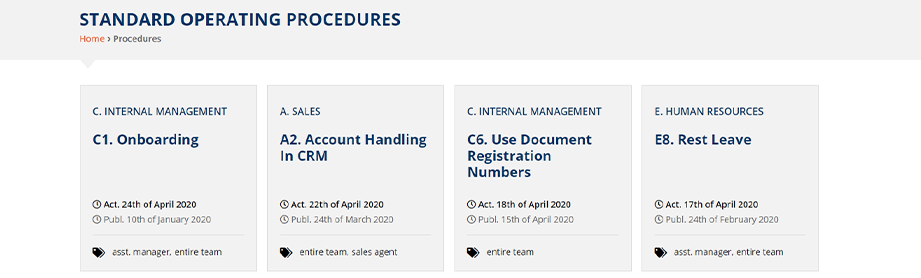
Image 7: Procedures in a category page
The SOP notification system sends each person an email with the procedures that were added or modified since the last time they were accessed. Upon receiving the email, each person, logged into their account, must view and accept the changes made to the procedures. They are also able to view the dates when each procedure was published and updated. (Image 8)
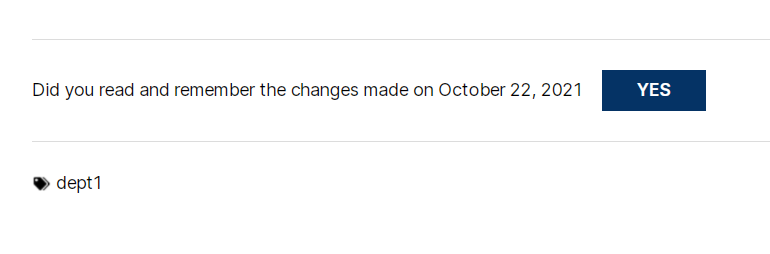
Image 8: Accepting procedure modifications button
Departments can be created from the Control Panel by selecting the Procedures – Departments menu. (Image 9)
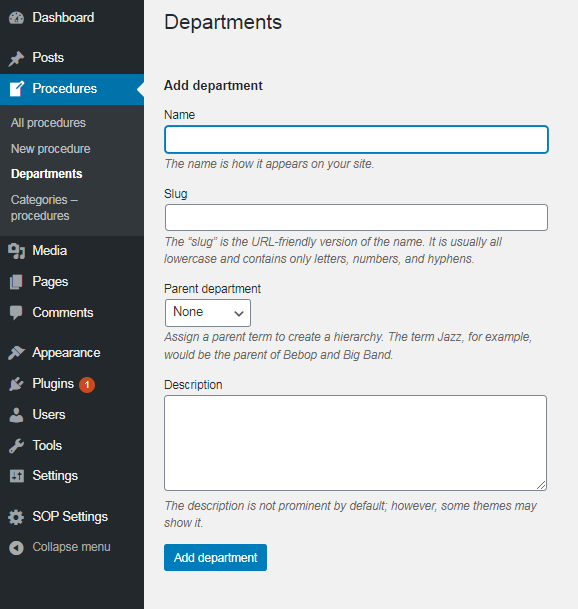
Image 9: Creating a department – option 1
Departments can also be added from the “Procedures” block when adding a new procedure. (Image 10)
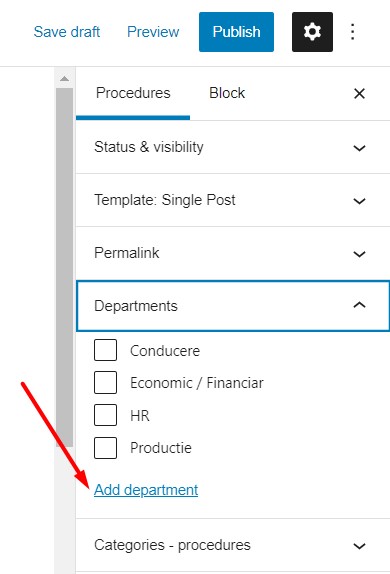
Image 10: Creating a department – option 2
Note: When adding a new department using the above method, after publishing a procedure, users must be assigned to the newly created department (from the Users section).
Procedure categories can be added from the Control Panel by selecting the “Categories – Procedures” option (Image 11)
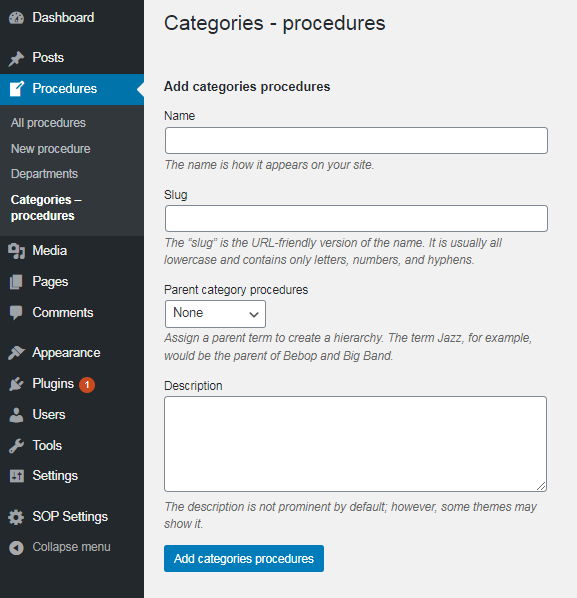
Image 11: Creating categories – procedures – option 1
or from the “Document” block when adding a new procedure. (Image 12)

Image 12: Creating categories – procedures – option 2
A new procedure can be added by selecting the “New Procedure” option in the Procedures section.
In the procedure adding page, after changing the text of the template (functionality included in the FULL and CORPORATE subscriptions) with the data of your procedure, on the right side, select the Department of the procedure as well as its Category.
Users can be assigned to departments from the “Users” menu. (Image 13)
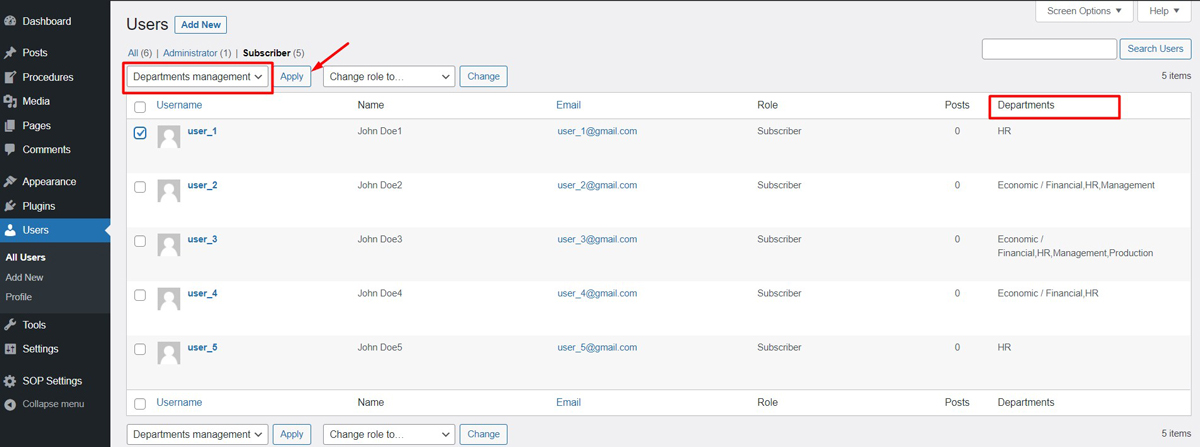
Image 13: Assigning users to departments – Users Page
Select the “Management of departments” option and the users for whom the allocation to departments is desired, and the departments will be selected from the window that opens. (Image 14)
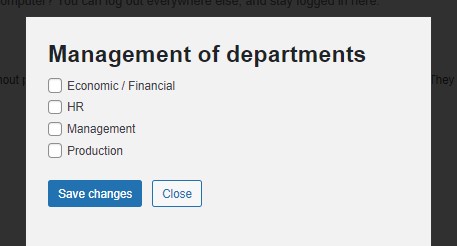
Image 14: Selecting departments for users
It is possible to individually assign each user to departments. This functionality is possible from the “Edit” or “Add User” screen. The “Edit Department” button in the “Manage Departments” section will open the department selection menu. (Image 15)
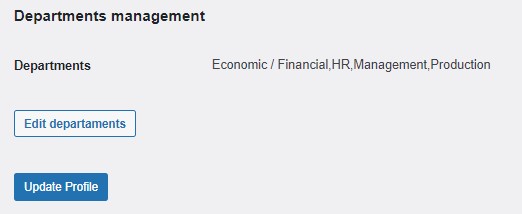
Image 15: Assigning users to departments – Edit user/Add user page
Functionality available in all subscription versions.
Using this functionality you can select and export procedures in PDF format. Select the desired Departments or Procedure Categories and press the “Download” button. (Image 16)

Image 16: Export pdf
This functionality is available with the FULL and CORPORATE subscriptions.
In this section you can see a history of users who have viewed, accepted, edited or deleted procedures. (Image 17)
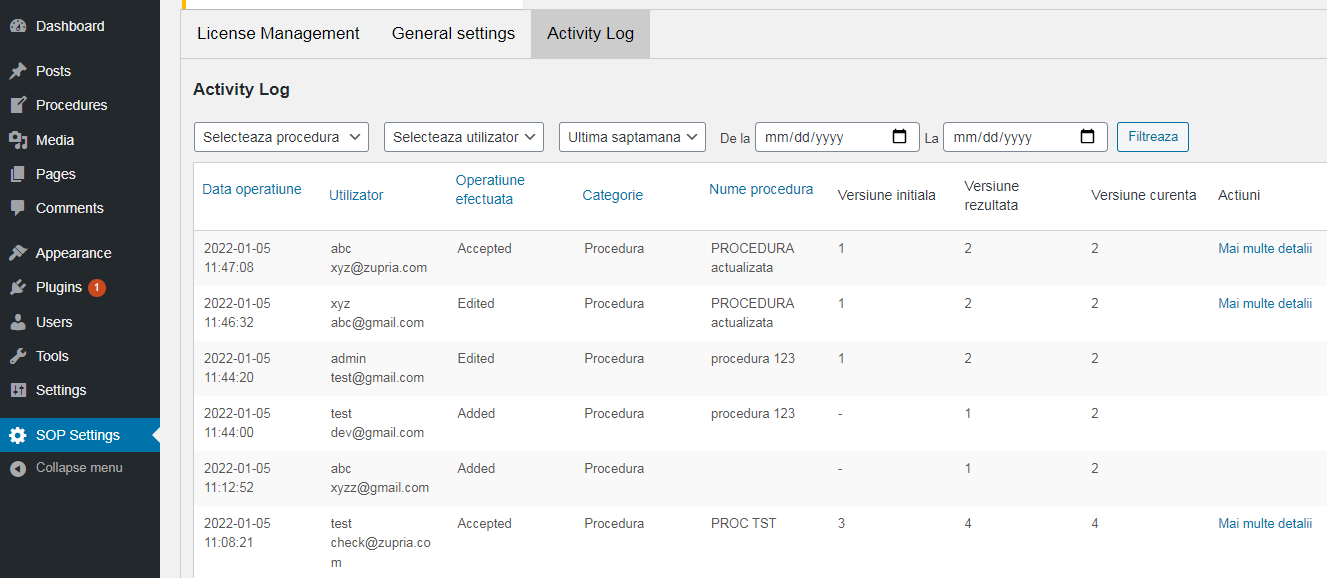
Image 17: Activity log
This functionality is available in all subscription versions.
The functionality highlights the changes made to the procedure. Thus we ensure that the recipient of the procedure has taken note of the changes. (Image 18)
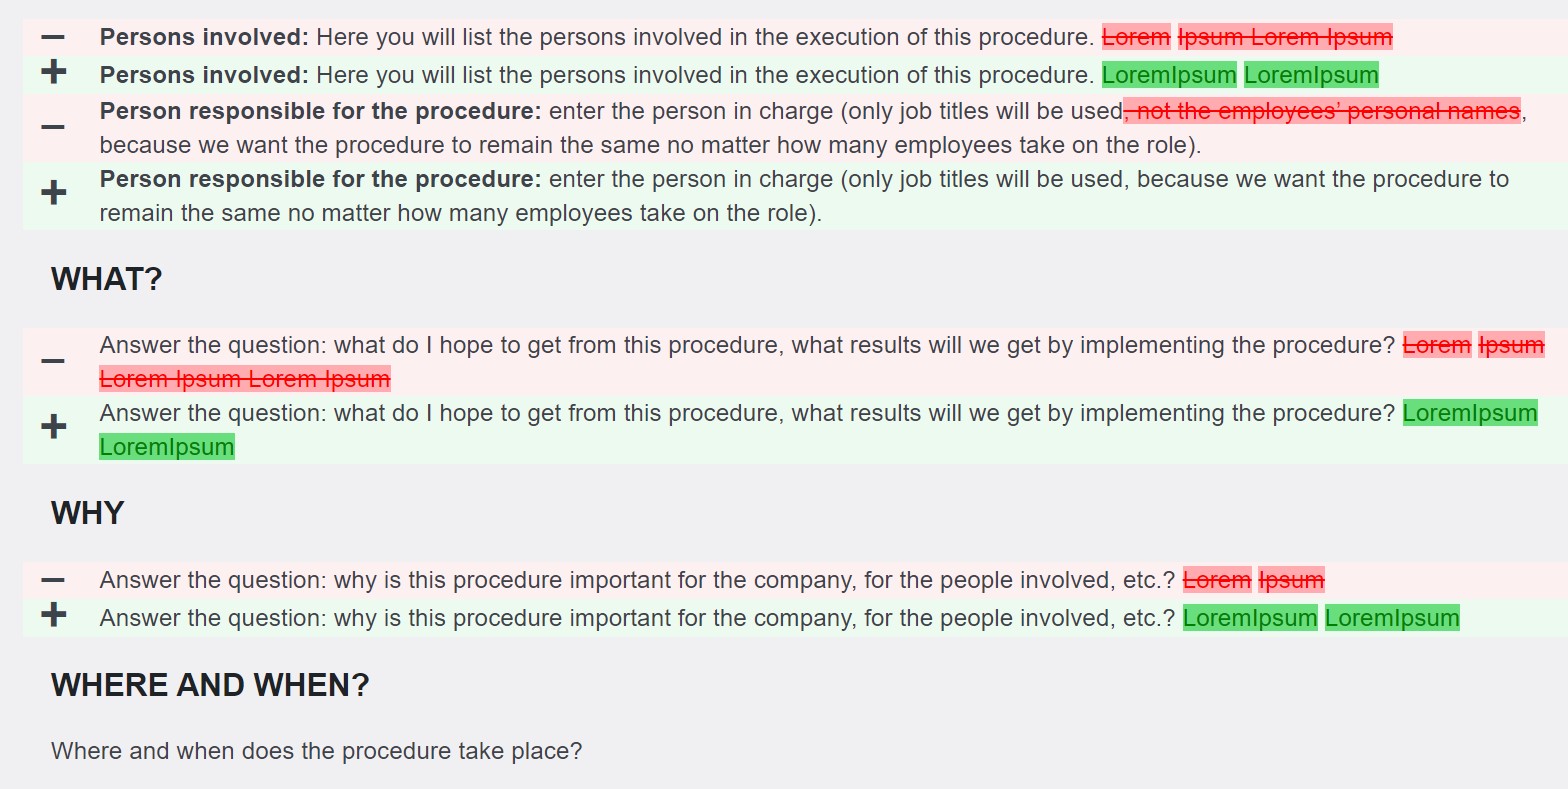
Image 18: Full version history
This functionality is only available in the Full and Corporate subscriptions.
The functionality offers the possibility to add dynamic questionnaires to any created procedure. Questionnaires can be created using open, closed or multiple answer questions. The answers can be connected with other questions from the three types mentioned above, resulting in a dynamic questionnaire based on the answer provided.
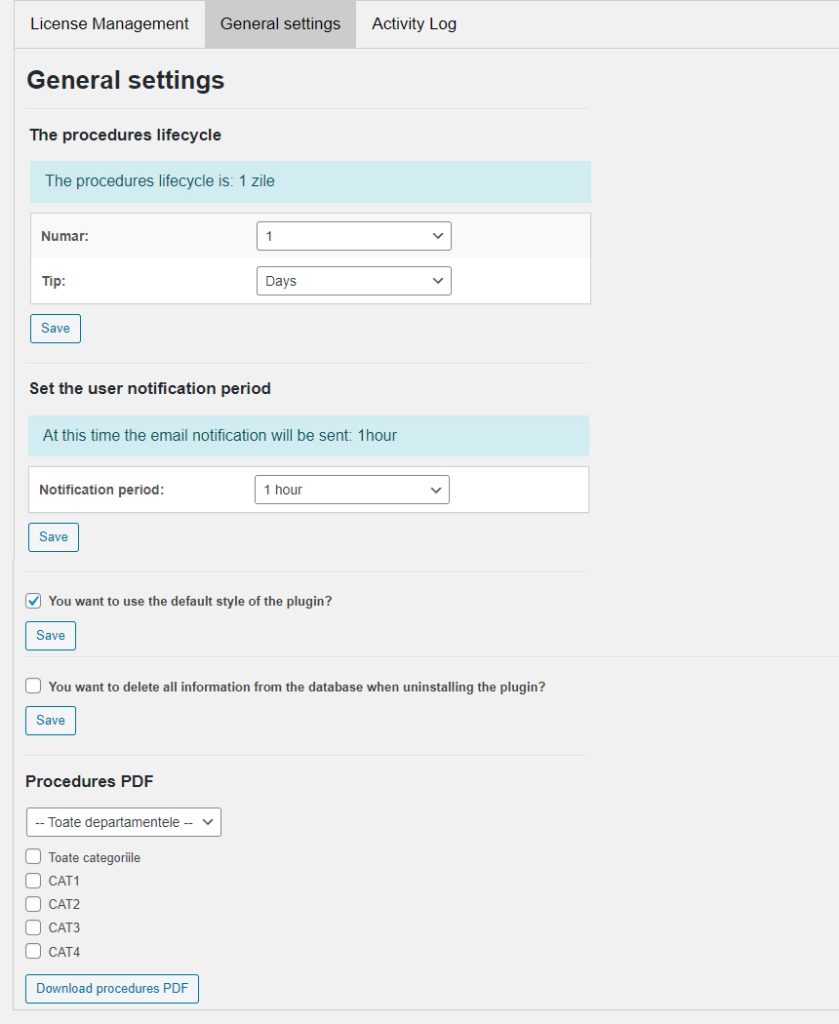
From the “General settings” menu, you can choose whether to use the plugin’s default style. Using a STANDARD subscription imposes a number of restrictions:
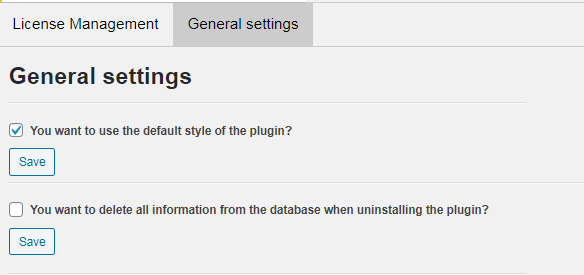
Image 19: Settings page – Standard subscription
Using a FULL subscription implies:
Image 20: Procedures template
In addition, from the “General settings” menu you can:

Image 21: Settings page – FULL subscription
Using a CORPORATE subscription implies:
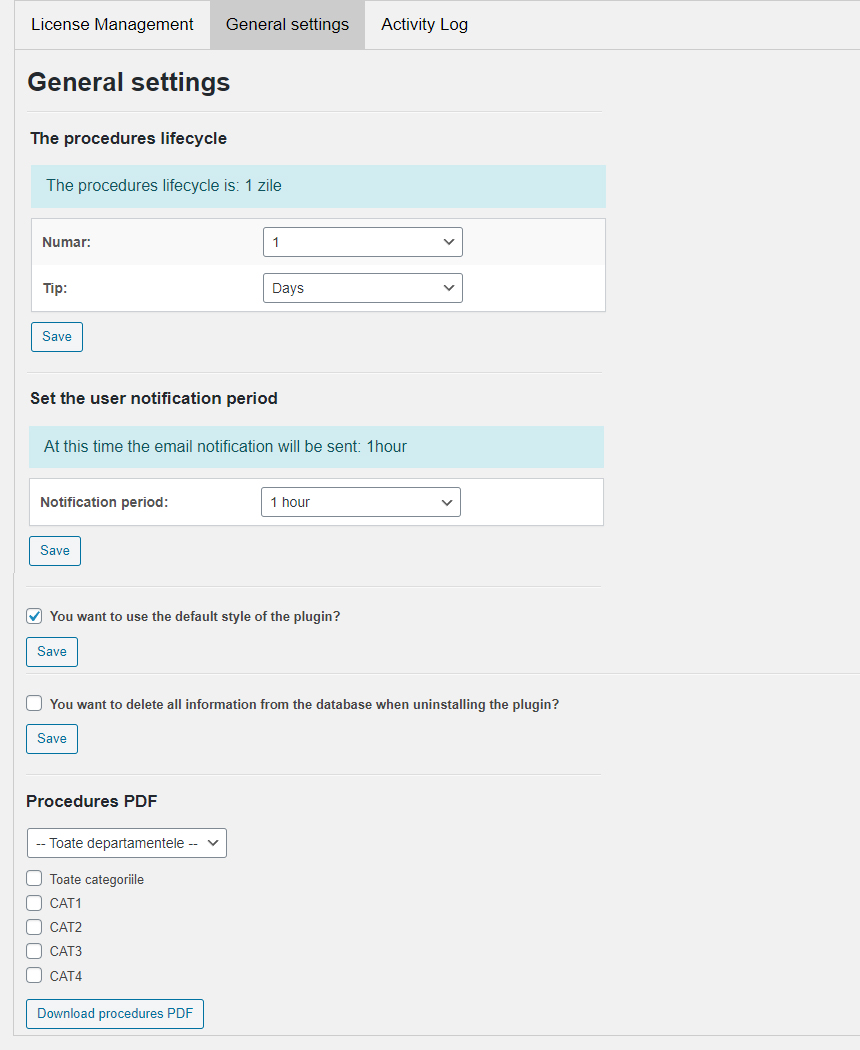
Image 22: Settings page – CORPORATE subscription
In addition, from the “General settings” menu you can:
The display language of the SOP plugin is the one set for the WordPress website. If you want to change the language for the plugin (eg. Italian), the first step is to change the display language of the website.
For this, access the control panel, the tab Settings, General, Site Language and then choose the Italian language from the dropdown menu. To save the setting, press the “Save Changes” button.
Thus, the site control panel and, implicitly, the SOP Settings page, will be displayed in the Italian language.
Note: the SOP plugin is available in the following languages: EN , DE, ES, FR, IT, NL, PL, RO, CZ. If the website is displayed in any language other than those listed above, the SOP plugin will be automatically displayed in English.
When uninstalling the plugin, in the “General Settings” menu, you can choose whether you want to delete all information related to the “SOP – Standard Operating Procedures” plugin from the database.
To upgrade your subscription, you must log into your account (Image 23).

Image 23: Login
If you are already logged in, click on “My account” (Image 24)

Image 24: My account
Step 1: on your profile page, click “View license”

Image 25: Upgrade – step 1
Step 2: click “View upgrades”

Image 26: Upgrade – step 2
Step 3: click “Upgrade license”

Image 27: Upgrade – step 3
Afterwards, you will be redirected to the “Checkout” page, where you can check the billing data and complete the upgrade process.
SR EN ISO/IEC 27001:2018 Information Security Management Certification Certificate